Survey App
Survey App
Step by Step Survey App Guide:
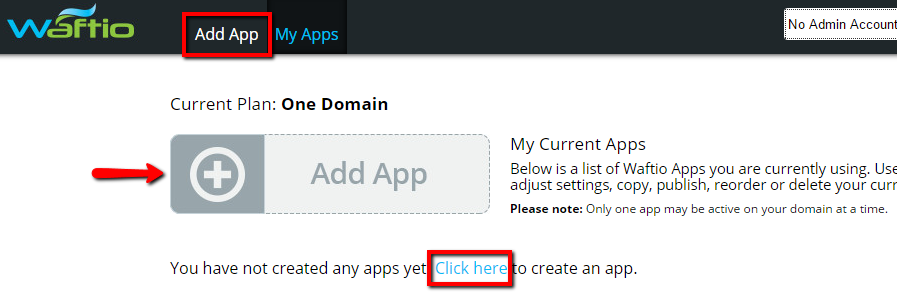
1. From your Apps Manager Section, click on 'Add App' tab on the upper left portion of the page beside Waftio logo. You may also opt to click 'Add App' icon or 'Click here' (see below).
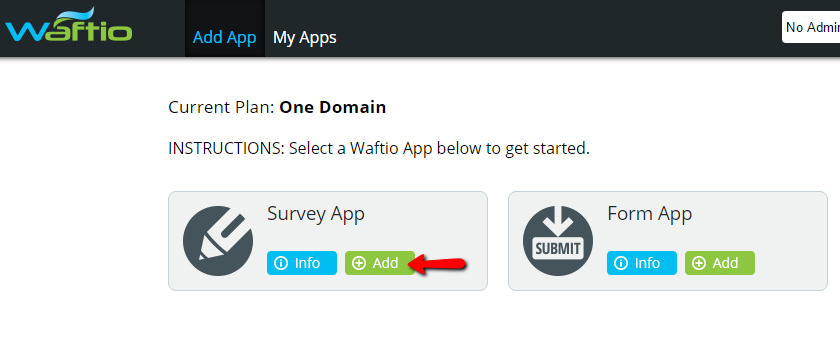
2. Next, from the list of apps shown, look for Survey App and click the green 'Add' button below.
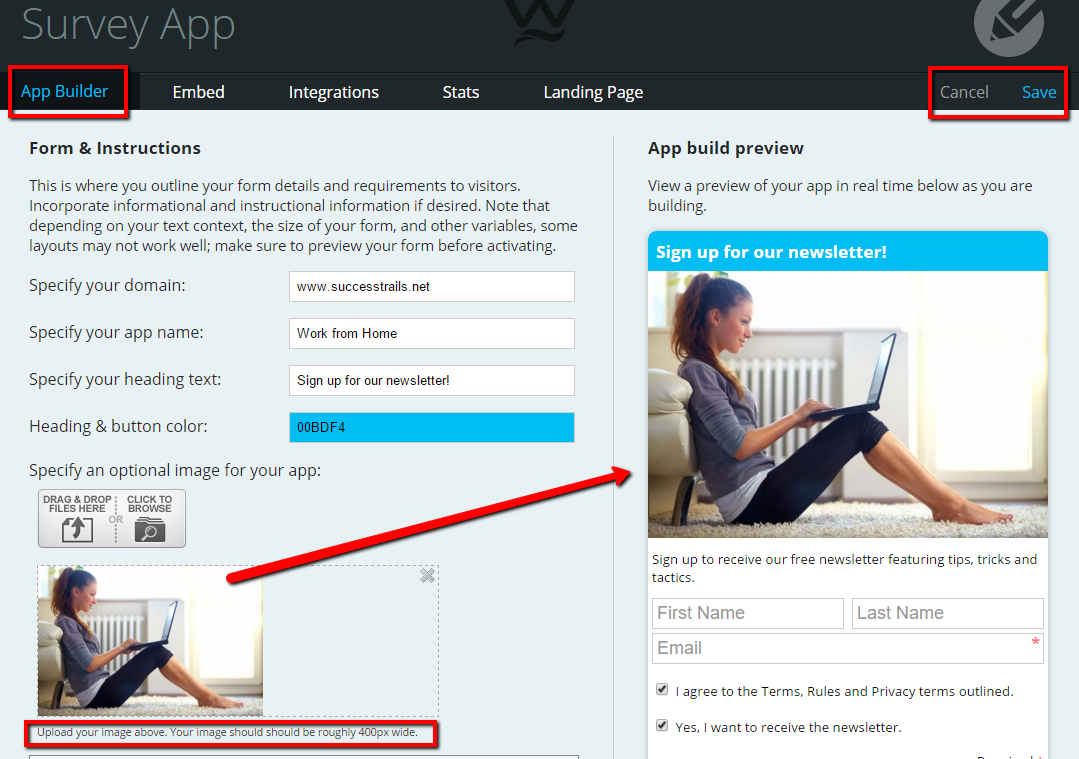
You can specify the details of your Survey App with each settings on the App Builder, Embed, Integrations, Stats and Landing Page tabs.
3. Fill up your Survey App data on each of the information boxes on the 'App Builder' tab as shown on the sample below. You can also upload an image for your Survey App, and see its preview on the 'App Build Preview' on the right. Your image should be at least 400px wide. Save your work after or Cancel changes made via the buttons on the upper right.
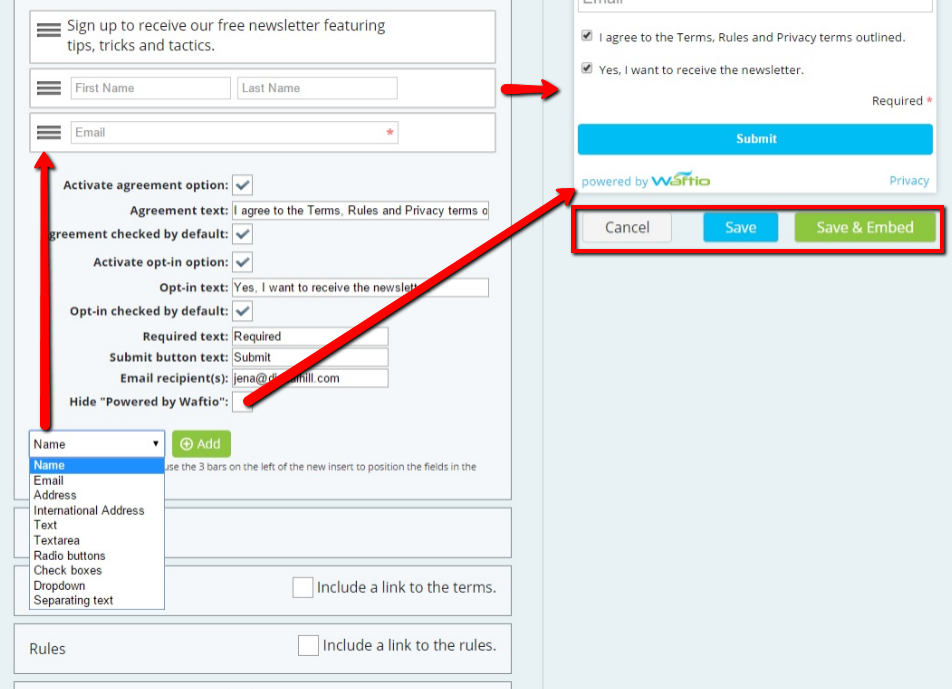
4. Next is to set the text boxes for the information that you want to collect from your subscribers. You can add an info textbox by selecting from the dropdown menu (shown below) and clicking 'Add' button. Other infos are also optional by ticking or unticking checkboxes with corresponding functions.
You can edit the order of the information boxes by dragging the 3 bars on the left of texboxes (see below). Preview of your app settings is shown on 'App Build Preview' on the right. You may edit by clicking Cancel at the bottom of the Preview; Click Save or Save & Embed after.
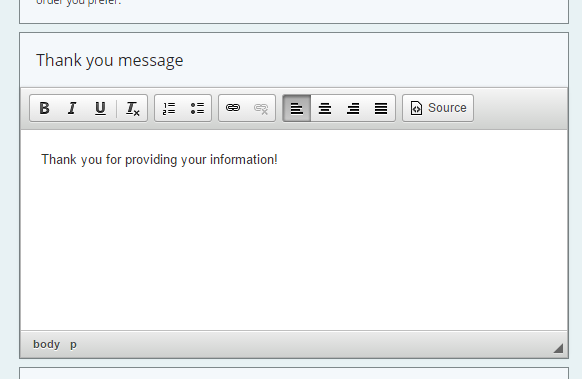
5. You can compose your own thank you message on the 'Thank You message' box (see image below). Thank you message appears once a subscriber submits the form or click the 'Submit' button on your Form App. Note, you can use the link function below to link to a downloadable PDF ebook or coupon that you upload here as well. It's a great way to offer a free resource to grow you email list!
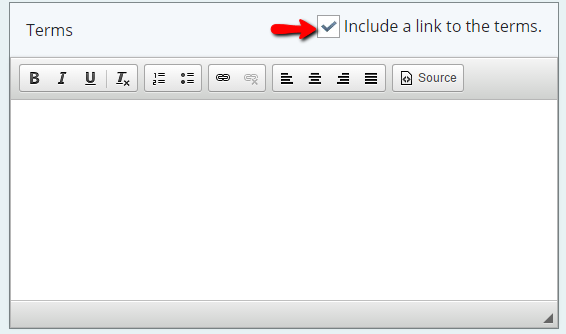
6. Terms of your Survey App can be specified on the 'Terms' textbox (see below). Tick the checkbox on the right to create a hyperlink on the 'Terms' text located below the 'Submit' button.
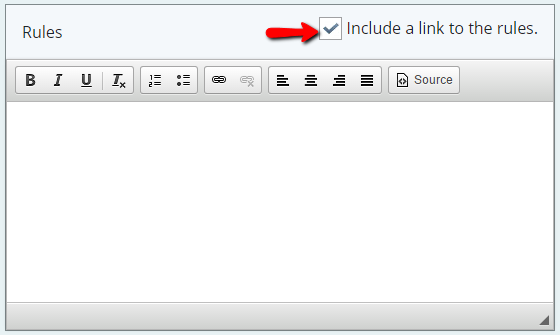
7. Rules of your Survey App can be composed on the 'Rules' textbox (see image below). Tick the checkbox on the right to create a hyperlink on the 'Rules' text located below the 'Submit' button.
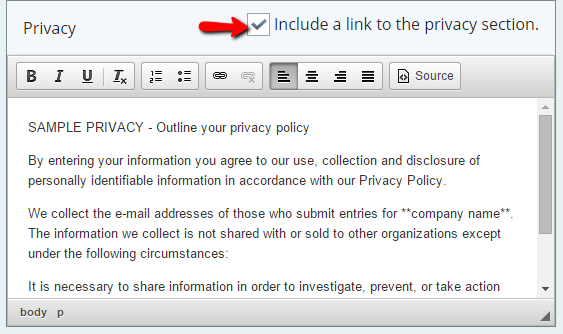
8. Privacy terms of your Survey App can be composed on the 'Privacy' textbox (see image below). Tick the checkbox on the right to create a hyperlink on the 'Privacy' text located below the 'Submit' button.
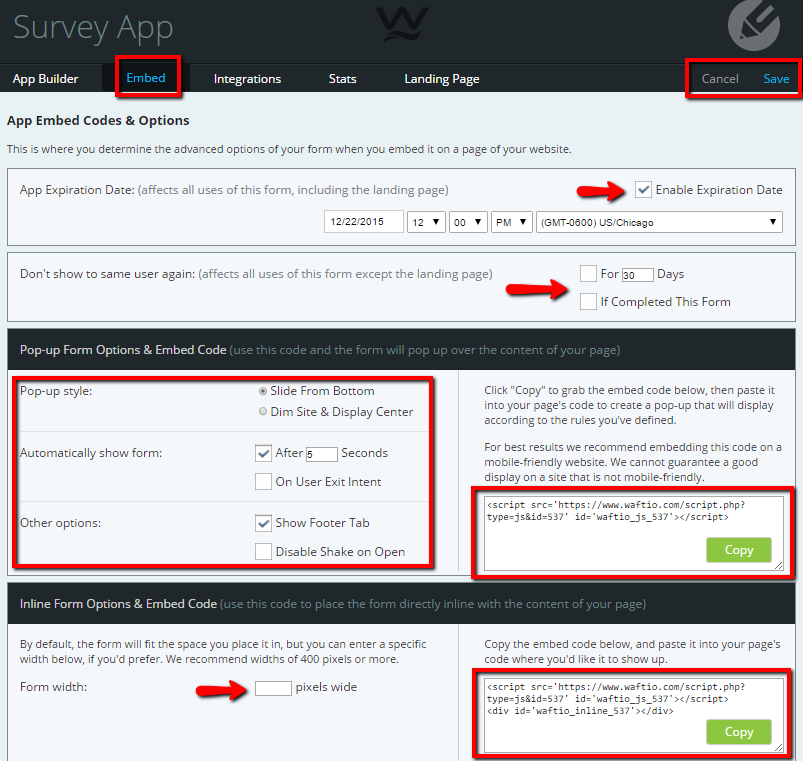
9. Embed tab is where you can customize your form (Pop Up or Inline Form) and embed it on a website. You can set the duration, style, and size of your form appearance by ticking check boxes in the corresponding functions and setting your preferred digits. The codes of your form appears on the textbox on the right in which you can copy and paste on your web setting. Again, you may Save or Cancel your work afterwards.
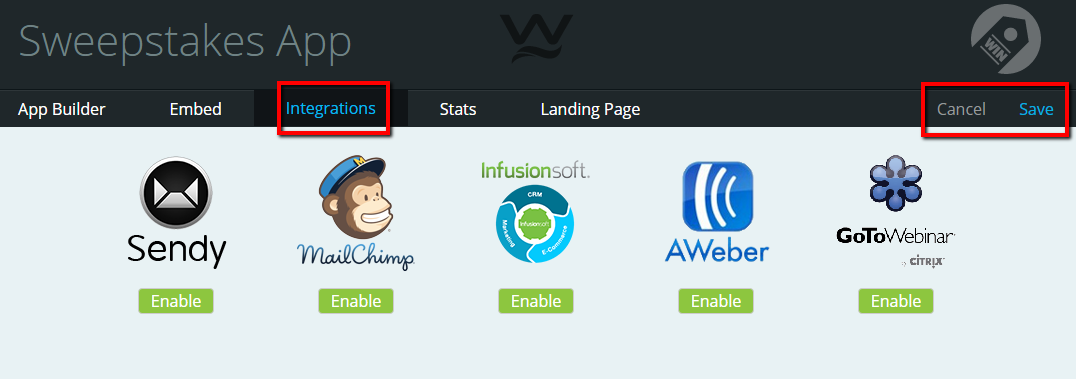
10. Waftio offers an easy integration for each of the form apps. On the 'Integrations' tab, just click 'Enable' button below the integration app logo that you want to use then supply your integration data that will be asked.
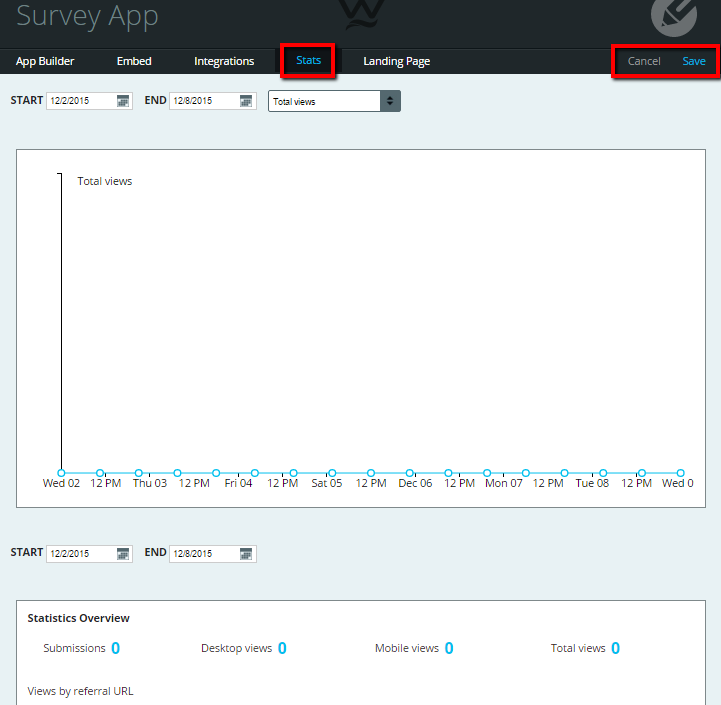
11. You can monitor the Total Views and Statistics Overview of your app promo via the 'Stats' tab. Set the date coverage of the report that you want to view and you can see the report with graphs and totals (see below).
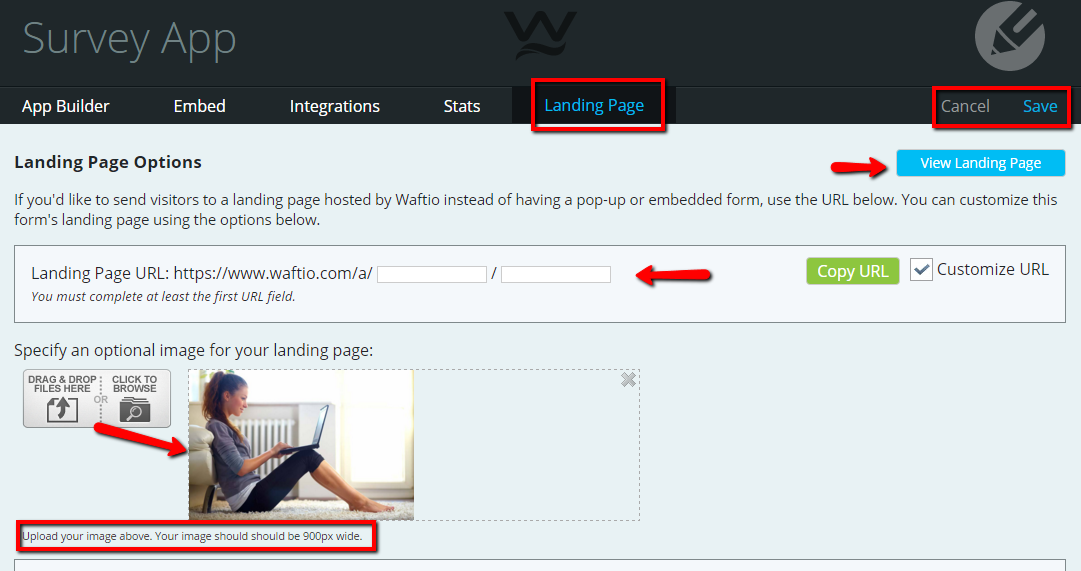
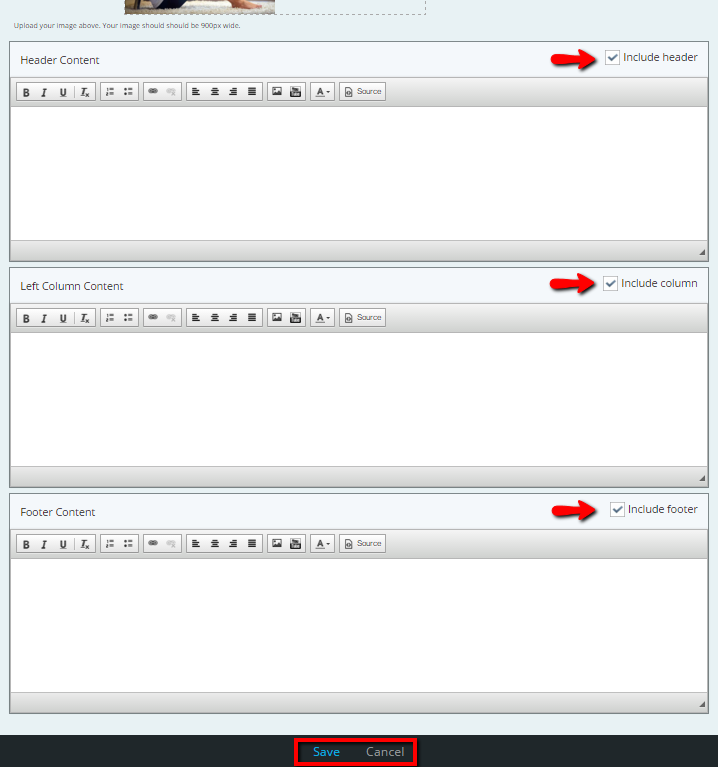
12. Waftio also gives you an option to lead your customers/viewers to a Landing Page instead of a pop or inline form on your website. You can customize your landing page settings in the Landing Page tab. Set its URL, image, and its contents (header, left contents, footer). Preview your Landing Page by clicking View Landing Page button. Aside from being seen on the upper right portion, Save and Cancel buttons can also be clicked below every tabs.
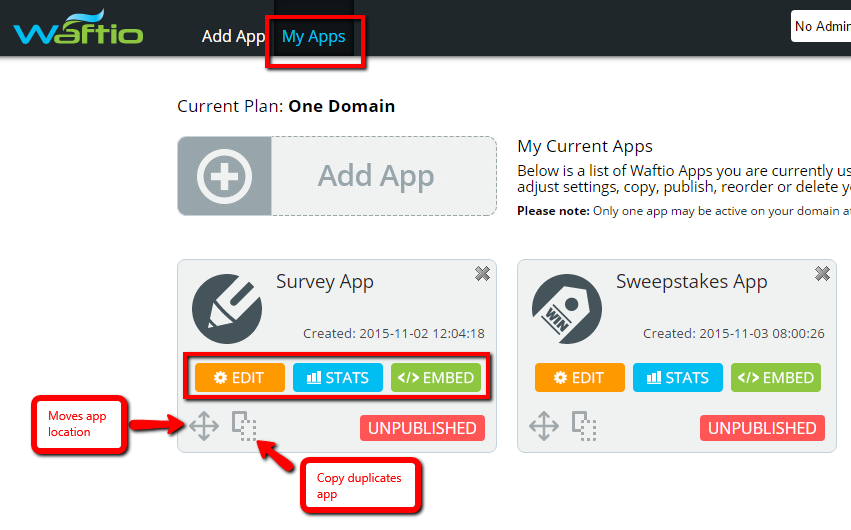
13. All the apps you are using will be seen on My Apps tab. This is also where you go to edit all your apps. On each app you have created there is ability to duplicate the app so that an exact replica of your setup is created to make it easy to make new apps similar to others you already have.
